
Product Guide
A comprehensive guide to using Mercer | Mettl’s Examine Platform.
Introduction
Welcome to the comprehensive guide to Mercer | Mettl’s online assessment platform that will acquaint you with its abilities. You can read from the beginning or choose a topic of your interest from the Table of Contents.


Getting Your Faculty onto Mettl
To collaborate with your colleagues on Mettl, you can create custom roles and assign them to different users based on the role they play.
Create Roles
‘Roles’ are a collection of permissions that can be assigned to your faculty (view/edit/delete) depending on the level of access required.
Some egs of roles you can create are
- A proctor who only has permissions to proctor tests being taken.
- A faculty member who can only evaluate tests and view reports.
- A question paper creator who can only create tests and share links with test takers.
You can create custom roles like this based on your faculty structure and processes. Each user would have their own login credentials with access restricted as per the user role assigned to them.
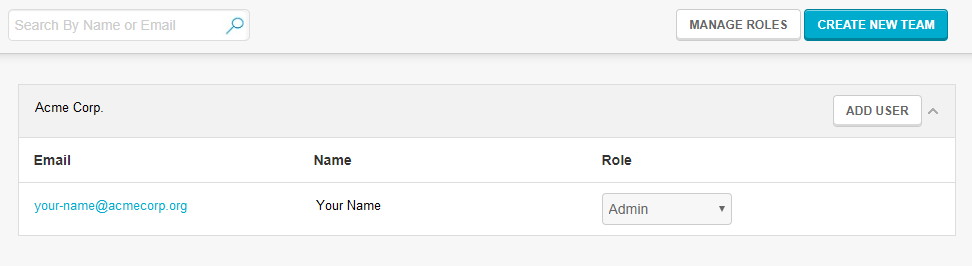
Add/Manage Users
After creating the Roles that you require, you may return to this section and click on Add User and enter the first name, email ID and the Role of each of your colleagues.
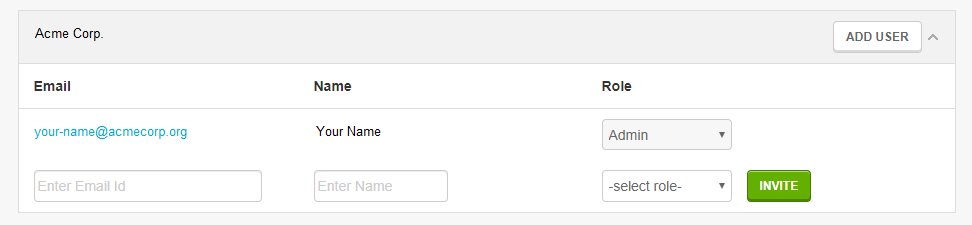
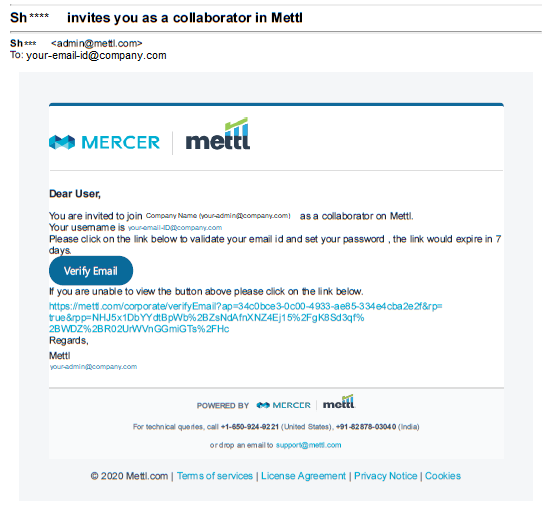
Clicking on Invite triggers an account activation email from admin@mettl.com to the mentioned email IDs with instructions to activate and login.
Account Hierarchy – Creating & Managing Parent-Child Accounts
Account-Hierarchy lets you create sub-accounts/teams within your account for the various set of users.
This has been designed for the privacy of content between multiple teams. For eg – departments in a college where the Chemical Department’s users would not be able to see the content or assessments of the Mechanical Department as both can be child accounts in the College’s parent account.
Read more:
Setting up your Account, GDPR & Customizations
You can personalize your account by navigating to: Account Settings>Details
You can customise the appearance of the test window starting with your Institute’s logo in the Test Window Customisation section. To enable premium customization options like custom favicon, test background, theme, custom test taker support numbers, please contact your account manager.
| Suggested Dimensions | Max Size | Supported Formats | |
|---|---|---|---|
| Logo | 160x60px | 100kb | jpeg, jpg, png, gif |
| Favicon | 8x8px | 10kb | ico, png |
| Test Background | 1920x1080px | 2000kb | jpeg, jpg, png, gif |
You may also add an explicit consent statement to take consent from your test-takers whenever any personal information is being collected. The consent statement should clearly convey the following:
- The purpose of collecting the personal information
- Mention the entities/organizations who require this information
- Duration of storing this information
This is a mandatory step for our GDPR compliant customers. Click here to read more.

Creation & Bulk Import of questions
Types of questions
Mettl gives your faculty the option to use a plethora of question types as shown in the table below.
While most questions support automatic evaluation – i.e. you can provide the correct answer or the scoring logic at the time of question creation, some questions like the Upload type, Diagram type, Audio/Video Recording question are manual evaluation based.
We also have the following questions types, reach out to your Account Executive to enable these –
- RStudio Questions
- Audio Questions
- Mean Stack Questions
- Video Questions
We offer the most extensive library of coding simulators, you can use our front-end, back-end and fullstack simulators, among others, to conduct high quality coding tests.
You can read All about our Coding Simulators here.
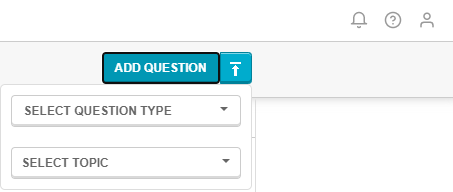
Creating/Bulk Importing Questions
Questions can be added one by one through the platform through Mettl’s WYSIWYG editor and in bulk using our Excel templates. Please refer to the support articles linked to each of the question types above.
Organizing questions
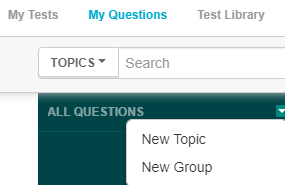
Before creating your questions, it is important to plan how you will be storing them for easy access. The hierarchy is a tree structure comprising of:
- Groups
- Sub-groups
- Topics
Groups can be one subject like Maths. A subgroup within Math would be Trigonometry under which there would be different topics.
All questions need to be associated with a Topic. Furthermore, questions need to be assigned one of three difficulty levels – Easy, Medium or Difficult.

Creating your test
After you have uploaded your question banks, configuring the blueprint of a test is the second and final step to create your custom test. This step is synonymous with importing the question paper’s structure onto Mercer | Mettl’s test platform.
The blueprint of a test determines many factors, some of which are:
- The total duration of the test and individual sections.
- The uploaded question banks from which the test platform will randomly choose and display questions to the student
- The number and order of sections in the test and how many questions to display per section. For example-Like in an English test, you can have multiple sections like grammar, reading comprehension, long answer questions, etc.
- How many marks to award to the student for every correct and incorrect answer.
Irrespective of the type of questions that you include in your test, there are 3 types of tests that you can create
- Timed Assessment: A test that has to be completed in one sitting. Once submitted, the student can’t revisit the test. This test type is suggested for traditional tests like internal and end semester examinations.
- Deadline Based Assessment: A test in which the progress can be saved and the student can revisit the test any number of times before the submission date and time. This test type is suggested for assignments that have a submission deadline.
- Practice Session: A test that contains no test duration and marking scheme and no report is generated for the same. The student can save the session and revisit it any number of times. This test type is useful to acquaint students with Mercer | Mettl’s test platform before their first test on the platform.
To learn in-depth about how to create your tests, kindly refer to this article.

Anti Cheating test link Settings
To successfully conduct credible online tests and examinations, it is imperative to ensure that students don’t cheat. While sharing a test link with students, you can enable and configure various test link settings, including anti-cheating features such as:
- AI auto-proctoring: This monitors the students’ behavior and actions via their webcam and microphone for any suspicious activities like:
- The student not present; looking away from the screen; covering their face.
- Additional person in the frame.
- The student using a mobile phone.
- Human-led Proctoring: A human invigilator can monitor multiple students in real-time, wherein the invigilator can communicate with the student by sending text messages, and pause and end their test as required. This is supplementary to the above mentioned AI auto-proctoring and acts as an additional layer of security.
- Mettl Secure Browser (MSB): A custom browser that temporarily locks the computer to prevent unauthorized resources being used during a test by controlling access to system functions, websites, and applications. It is recommended that the students install the browser before the test.
- Browsing tolerance: This keeps track of the number of times a student navigates away from the test window, wherein a warning is displayed to them each time they do so.
A combination of these anti-cheating test link settings can be used according to the test’s stakes. If anti-cheating settings are enabled, in the reports section, you can filter students based on the credibility index. The test taker Credibility Index helps identify students who resorted to some means of cheating while attempting a test. Students with a low credibility index have a higher likelihood of having cheated and vice-versa. The index has values – High, Medium, and Low.
To learn in-depth about anti-cheating test link settings, kindly refer to this article.

Test link sharing and bulk invites
After you have created your test, the next step is to share it with your students. You can individually invite students to attempt a test or in batches by creating test taker groups.
Test taker groups are groups of students whose details can be mass uploaded onto the platform. These could be groups of students belonging to different courses or batches. Once uploaded, any test on the platform can be shared with one or multiple groups. This way, you won’t have to individually upload the details of all the students every time you schedule a test.
Here is an article on how you can invite test takers.
The access to a test link can be public or private.
- Private: If you want a specific group of students only to attempt the test, Private Access can be used to share invitation emails. After clicking on the start test button in the received email, the students can start the test
- Public: If you don’t want to restrict access and let any student attempt the test, you can manually broadcast the test link with a medium of your choice
Resume a test
The responses of the student get periodically synced with our servers. In case a student gets disconnected from the server due to power-failure/ internet malfunction, a message is displayed to the student stating the connection failure. During this time, the timer of the test gets paused and the test window tries to re-establish connection with the servers. After this there can be 3 scenarios:
- If the student doesn’t close the test window and is able to re-establish the connection with the servers within 30 minutes from the connection failure message, they can resume the test from where the test last got synced with servers.
- If the student closes the window but is able to connect to the internet and re-opens the test within 30 minutes from the connection failure message, they will have to wait for 7-8 minutes for the test to resume from where the test last got synced with servers. Note-If test taker authorization is enabled, the student will have to resubmit photo proofs and get re-authorized by the proctor.
- If the student is unable to establish a connection with the servers within 30 minutes from the connection failure message, their test will be expired.
Here is an article that will guide you on how to resume a test in this scenario.
Reports
After students complete and submit their test, you can view all the reports on this page. To see the reports of a specific test, click on the Test Takers button located on the tile of that test in the Examine dashboard. The number of reports available at that moment is indicated while hovering the mouse over the button itself.
You can filter and search for reports based on:
- Student’s name or email address.
- Student’s Performance based on overall or section-wise score
- Credibility Index
- Date range of when the test was attempted
You can view the individual HTML reports, or download selected/all PDF versions of them to view offline. You can also download a combined excel report of selected/all test-takers, which will contain information like:
- Section-wise summary of the test.
- Registration field details of the test taker and test related details.
- Skill/topic wise analysis of each test taker.
Along with the reports of the test takers who have completed the test, you will also be able to view the status of all other privately invited test-takers who are currently taking the test (In Progress) or are Yet to Start.
Student Guidelines
Test takers could be taking a test in one of the following ways. The test taker’s experience for each of the tests will be different from one another along with the system requirements. Click on each of the following to understand the test taker experience.
- A non-proctored test
- A proctored test
- A test on Mettl’s Secure browser
- A proctored test on Mettl’s Secure browser
You can also share these pages with the test takers depending on the test type they are attempting to be used as a guide for them. In all of the cases, the test taker can access their test through one of the following ways,
- Click on the start test button received in their email
- Enter the test link received in a browser
- Enter the test invitation key on test.mettl.com
Examine Integrations
Examine REST APIs
What can be done using Mettl Examine APIs based on the REST framework:
The API consumer may:
- Create a new assessment
- Fetch details of assessments, schedules from their Mettl account and show on their portal
- Allow test takers to view available tests, start and take test from their portal
- Fetch information about test taker’s test states – started, active, idle, expired, complete and fetch results & reports of tests taken by test takers
- Create a schedule for a particular Assessment (Get notifications on test start, end, expired-resume, result completion events asynchronously
- Delete the test details/results for a test taker for completed/expired tests
What cannot be done using Mettl APIs and need to be done on Mettl website:
- Question creation,
- Test Taker management and Test Taker registration field management
- Taking a test (i.e. test takers will attempt the test on Mettl window only, however, they can choose and start test from client’s portal)
Here are link to:
- Documentation
- FAQs
- Try out our APIs
- Code Samples (Available in C#, JavaScript, PHP, Python)
Configuring SP-initiated SAML SSO for Admins and Test-takers
To remove the hassle of remembering multiple credentials or the cumbersome process of entering endless string of registration fields to access assessments, Mettl supports smooth and quick integration between your system and Mettl’s assessment engine using Service Provider(SP)-initiated SSO with SAML. SSO mitigates compliance and security risks by giving control over user authentication:
- It lets a user login once and gain access to Mettl Account without being prompted to login again. SSO also enables the application to share information about users. This is both convenient and secure practice for the client.
- Test takers too, do not need to remember multiple credentials. A seamless transition between applications. Redirect test takers from your account directly on Mettl’s platform, enhancing the test taking experience.
To read more, click here.
 +91-9555-11-4444
 contact@mettl.com


